Welcome

I'm so glad you decided to join me on my blog. I'll offer product tips, techniques and information. You'll also see the more personal side of our business. I hope you'll enjoy following us on this new journey. Carol

Sunday, November 10, 2013

Sew Batik Challenge at NQA

We traveled to the Midwest and East this summer for some quilt shows. One of the shows we did was NQA (National Quilting Association) in Columbus, OH.Our good friends Bruce and Diane from Sew Batik sponsored a challenge at this show. The show had a patriotic theme so that was the theme for the challenge quilts. I have been to a lot of shows with a lot of challenge quilts. These were among the best quilts I have ever seen at a challenge. I want to share them with you here.


Look at all of those star points in the quilt on the top right. 


The quilting on the award winning quilt is amazing. You can see the texture of the extremely close lines of quilting. All of the parts of the fighter jet really stand out because of the way it is quilted.


I like the braided border in the Statue of Liberty quilt. The wine glass has an organza overlay to make it more realistic.


Two of the quilts in this grouping won ribbons. The flag has charms in the center of all of those tiny red squares and there are a total of 50 stars in the blue squares. Here's a close up of that quilt.


Stars and Sunbonnet Sue - What could be more Americana than that?


I love, love, love this mini Storm at Sea. What a great way to take a traditional block and change it up.


Here are a couple very non-traditional entries. The one with the faces probably has the most of the red challenge fabric that isn't a solid piece of any other quilt in the exhibit.


The top right hand quilt is a fun way to celebrate America and stitching, sewing and quilting. There's a pair of scissors, a pincushion and a quilt block in the design.


Quilts of Valor is such a worthwhile cause. It is great to see it represented in the Challenge Quilts.


This quilt incorporated crochet which I thought was very interesting so I wanted to share that detail here.


Isn't that Route 66 quilt fun? We drove along part of that road in our travels this summer. We had some free time one day and drove along a stretch of it in Albuquerque.

This is getting to be a very long post and this is only half of the quilts. I will do a second one with the rest of them soon.

Happy Quilting,

Carol


Thursday, November 7, 2013

The Outfit Was a Hit

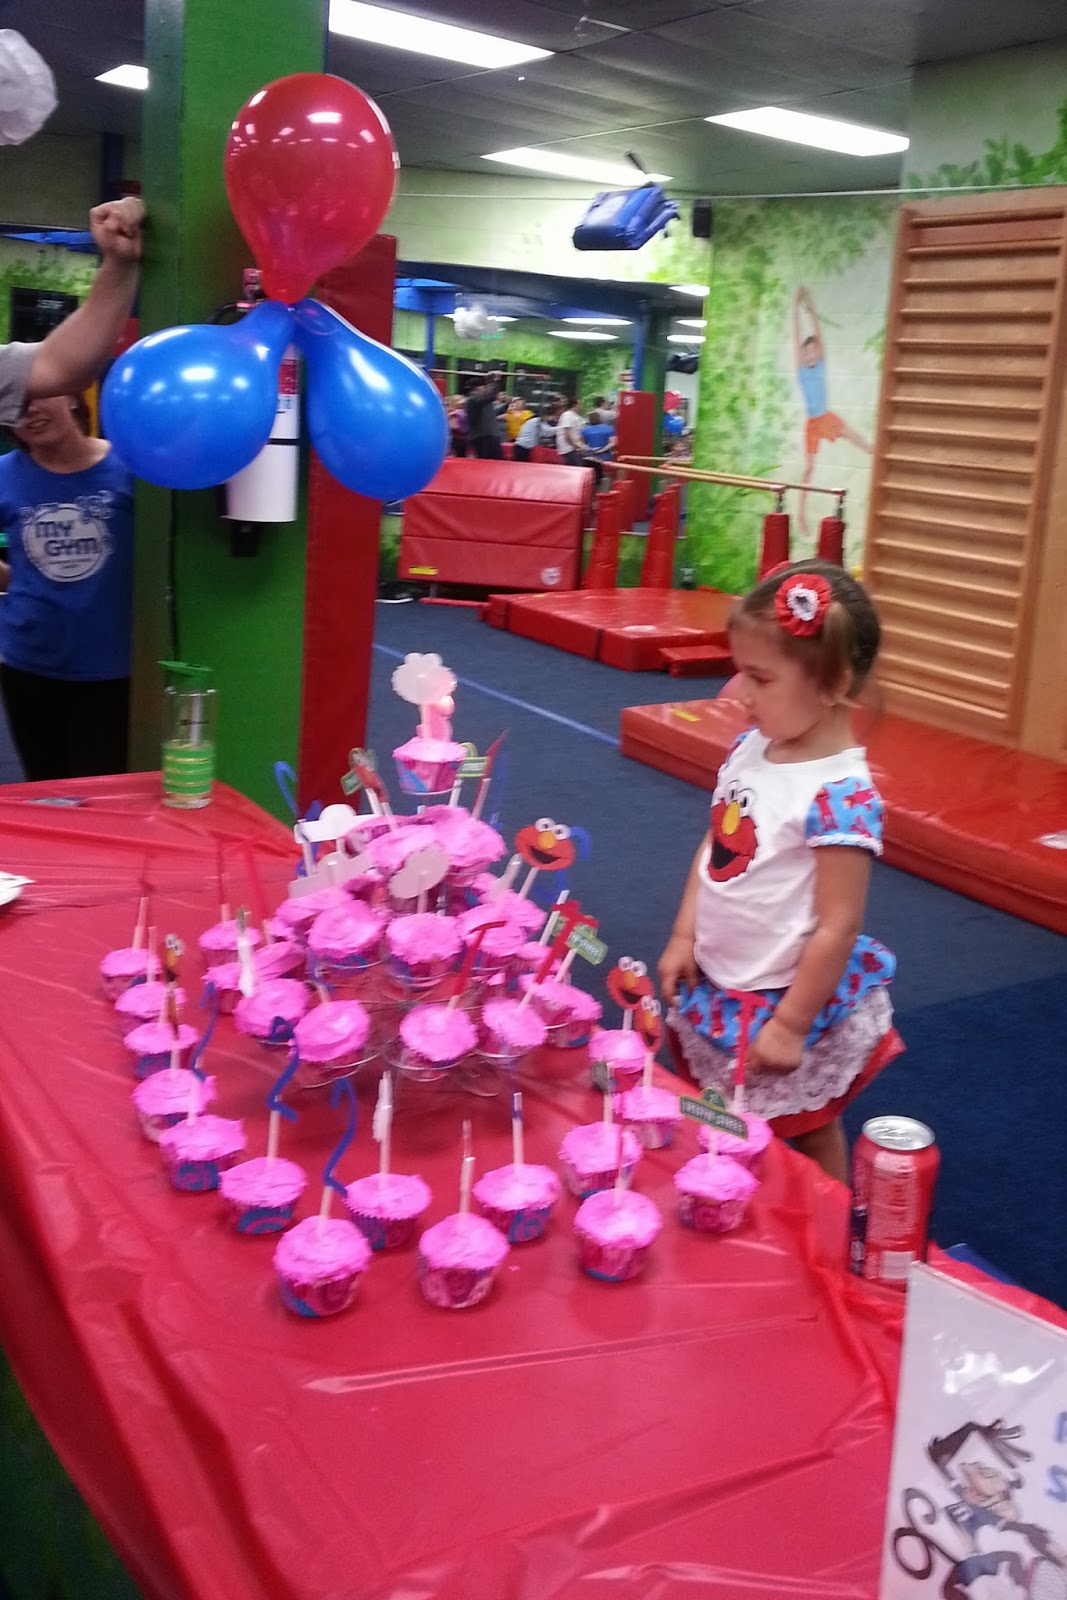
Tristyn was so excited when she saw her Elmo Birthday Party Outfit. The party was at the My Gym that she has been going to for the past year or so. It was her last trip there are a regular student. She will be going to gymnastics next.

I didn't hear all of the comments but my daughter told me that many people were very impressed with the outfit. They thought she bought it on Etsy.

The trampoline is one of Tristyn's favorite activities. She even has a little one at home. One of her favorite things to do is "jump." Here she is jumping on the trampoline at her party.


She had cupcakes with hot pink icing for dessert. She blew out her "2" candle all by herself. Here she is surveying her cupcake tower.


I'm pleased with how the outfit turned out, even without the lace trim around the neck it looks very cute. It was definitely a labor of love.

Happy Sewing,

Carol

If you like this post you might like the one showing how I made this adorable outfit.  


Wednesday, November 6, 2013

New Design

I woke up on Sunday inspired to create. I started an applique tea towel pattern several months ago and had some ideas about how to finish it. Here's the inspiration for one of the new designs.

Photo and a drawing from EQ7
The basket was a little tricky to do. Here's what I ended up with. 


There's some adjusting to be done in the value of the apples. The yellow one disappears into the background. At 3:00 this morning I thought of an easier way to do the basket too. I'll give it a try and see if that idea works.

Happy Quilting,

Carol


Friday, November 1, 2013

Pillowcases for My Granddaughter

When we were at a show last spring I saw a fleece panel with a dog on it. It is a little bigger than crib size. Since my granddaughter, Tristyn loves dogs, I bought it and gave it to her for Easter. Since that night, it has been the "sheet" in her crib. Her mom and dad have to make sure that they wash and dry it around nap and bedtime because she won't sleep without her dog.

She turns 2 years old today. It is time for her big girl bed. My daughter asked me if I'd make her a pillowcase. Since the dog is made out of fleece, my daughter thinks that if her pillowcase is made of fleece it will be like her dog, soft against her face.

I found several options when I was in Hobby Lobby recently. I asked my daughter what to get. There was Elmo who is Tristyn's favorite (see my post about the Elmo outfit I made for her birthday party), pretty colors and Disney Princesses. Trystyn picked the princesses. Her favorite is Sleeping Beauty and the fleece I found had her as one of the princesses, but she was featured at the fold and close to the selvages. In order to get the most Sleeping Beauty I had to fussy cut the panel. I did that and realized that I would only get one pillowcase from a yard of fabric. Of course when I went back to get more, they were sold out. That meant I had to come up with another plan. I bought some purple fabric and figured if I had to, I'd make it two sided -princesses on one side and solid purple on the other.

I went to another store to try and find the same fabric. But all I could find was a similar one in pink. So I bought 2 yards of that (learning from the first one that I would have to fussy cut this fabric too). I ended up making two pillowcases. One is all pink princess fabric. Again making the most of the Sleeping Beauty parts of the fabric. Then I did the double sided princess and purple pillowcase. The hope is that she will like both of them and will want to use both. That would definitely make things easier for her mom and dad because they will be able to wash one and put the other on the pillow. We'll see what happens when she starts sleeping in her big girl bed. The dog will still be there. He is going to be her top blanket. Here are her finished pillowcases.


Back of the Purple Princess Pillowcase

These are just simple rectangles of fabric sewn around three sides and hemmed at the opening. That's all my daughter wanted. They are nothing fancy but I think Tristyn will like them.

Happy Sewing,

Carol


Thursday, October 31, 2013

Elmo Outfit

My granddaughter, Tristyn is going to be 2 years old on November 1st. She is having an Elmo themed birthday party. A few months ago while I was on Pinterest I found this outfit.


My daughter liked it so I told her I'd make it for Tristyn's birthday party. I was at a show over the summer and found a really cute Elmo print in a Fat Quarter so I picked that up. I also found the perfect red fabric. It looks a little bit like red fur so it will make a good Elmo face. My daughter wanted to incorporate pink into the outfit to make it more feminine but pink and dark red don't really go well together. I found some lace at another show that I thought might work. Here is what I'm starting with to make the outfit.


I like the inspiration piece but for a little girl I wasn't a big fan of the "suspenders." My original thought was to add a little ruffle to the sleeve. But then I decided that I'd just replace the sleeve with the Elmo fabric. I made a dummy from muslin just to try it out. When I figured out how much fabric that was going to use, I discovered that I wouldn't have enough leftover for the skirt.

Instead of my original idea I tore out one of the sleeves from the top I bought and used it to make a pattern. Then I measured to see how much fabric I'd have left after what I needed for the skirt. It was just enough for the sleeves.The sleeves are in.


I found a pretty trim which I think will add some femininity to the outfit. I've sewn that around the bottom of each sleeve. 


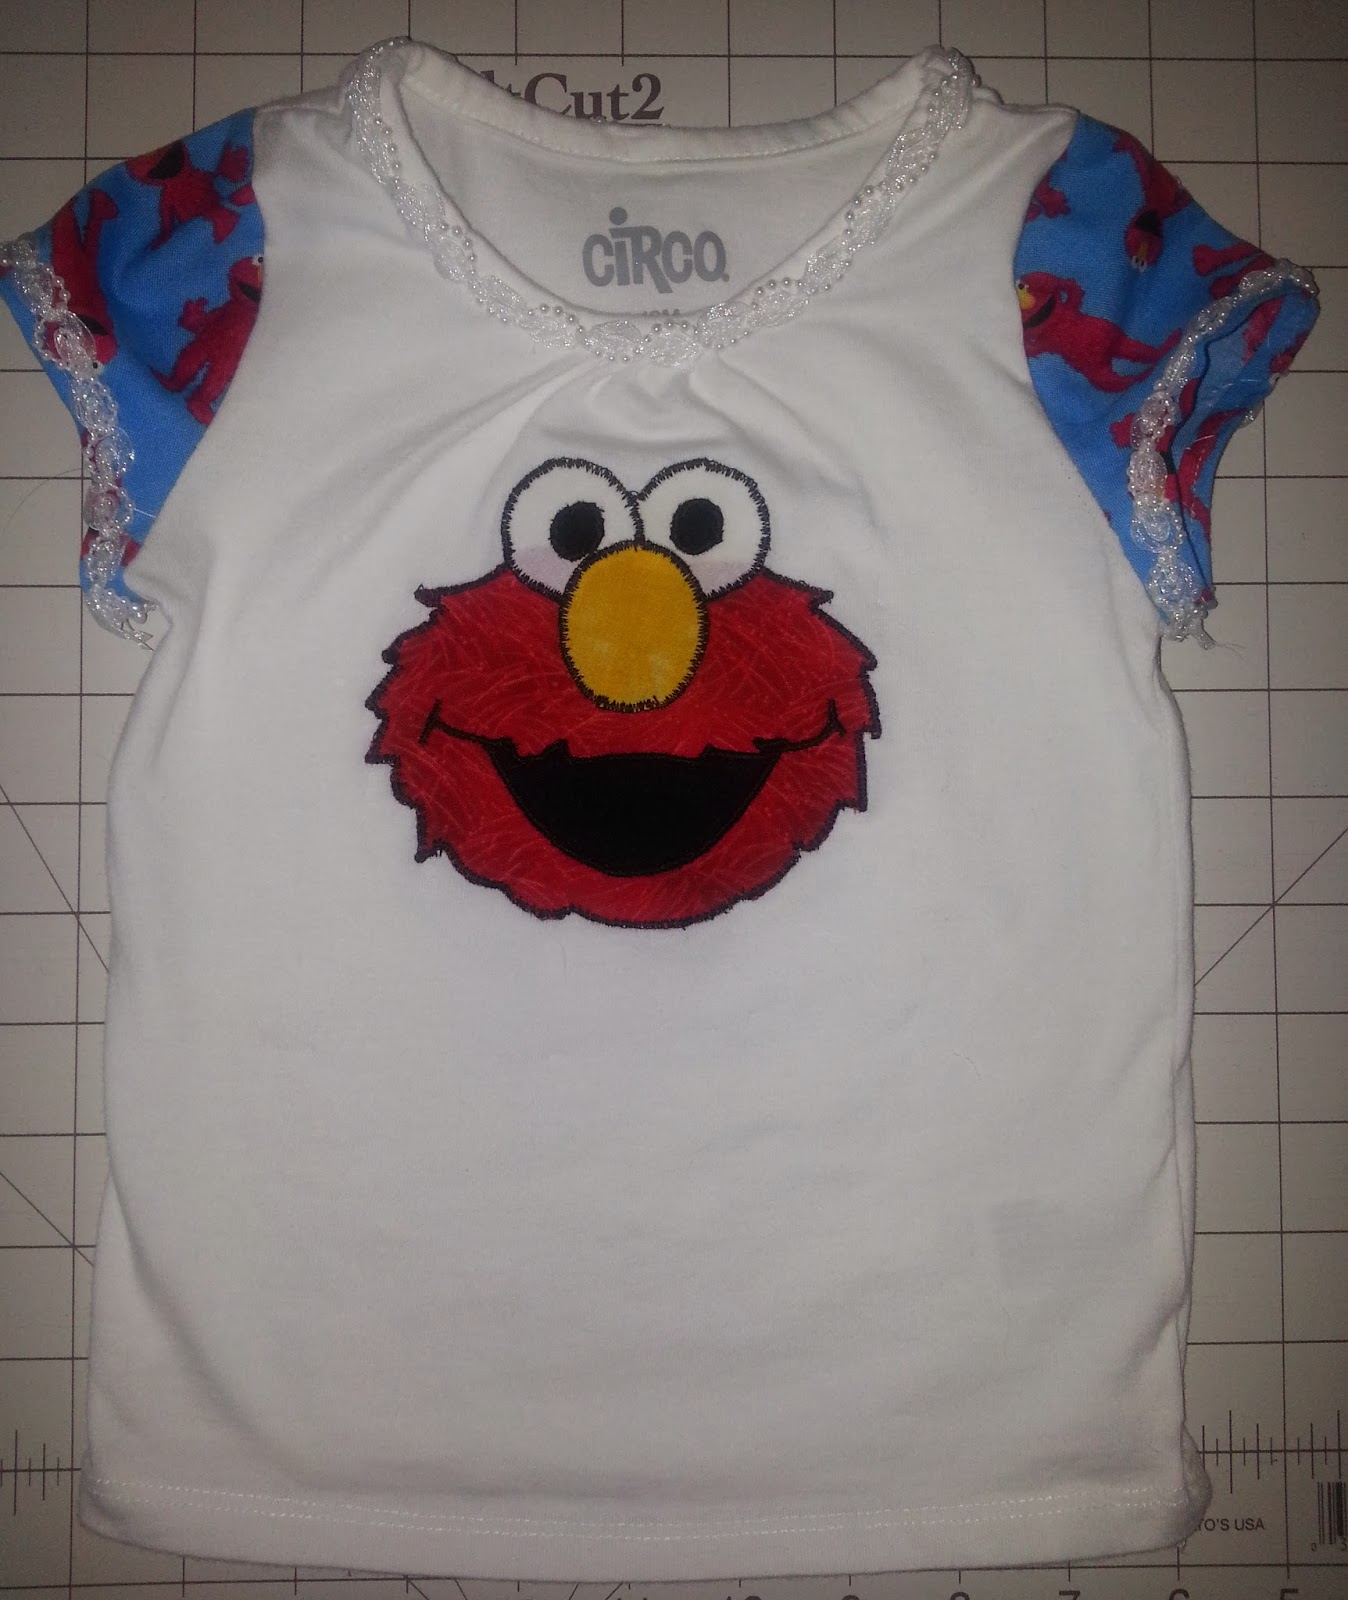
The next step is to add the face. I found a picture online and used that as my template. I played around with the size until it was what I wanted. Then I traced the different features onto fusible web and cut them out in fabric. I used an Applique Pressing Sheet to assemble all of the parts.

Left picture was my temlate for the fabric pieces. Right is the photo from the Internet. Center is the face in fabric

Now it is time to transfer it onto the shirt. I fused it in place. After looking at the pictures, I decided to do all of the stitching in black. I used a very small blanket stitch rather than a satin stitch at first but didn't like the way it turned out so I did a satin stitch which looks more like the pictures. All that's left is the trim around the neckline.


I used the same trim around the neckline. I'm really happy with how it turned out. I love it when I have a vision and the end result is even better than what I had in mind. Here's the finished top.


Next is the skirt. I want it to be full so even though Tristyn is pretty tiny, I used the full width of the fabric for my pieces. Since all I had was one fat quarter of the Elmo fabric I cut 2 strips 6" wide and sewed them together with a 1/4" seam. I cut the red fabric 10" wide. My original plan was to use the lace as an overlay to cover the red fabric. I finished the bottom of the Elmo and red fabrics by turning under 1/4" and then again another 1/4" and topstitched that. The lace has a nice scalloped edge so I didn't have to worry about finishing that.

When I put all of the layers together, I didn't like the way it looked. I tore everything apart and thought about it for a day or so. The lace just didn't look right. I decided to split the difference and  cut 1 1/2" off the top of the lace. Now it will be three separate layers. I like the way that turned out much better.


I got a little carried away with the project and decided to make hair bows too. I cut 2 - 5" circles from the leftover red fabric and 2 circles 1 1/2" from the tiny bits of Elmo fabric I had left. I put the Elmo fabric in the middle and made Yo-Yos from the red. I used the same trim and sewed that around the edges and filled up the inside. You can see a hint of the blue fabric, and if I had known when I started that I was going to add the trim, I probably would have left it out. But I got caught up in the embellishing.


It has been a long time since I designed a garment. As a matter of fact, I'm not sure that I ever did; I always used a pattern. I was pleasantly surprised at how well I remembered all of those skills from when I made my own clothes and did Halloween costumes for my daughters when they were little. I think the outfit is adorable. I can't wait to see Tristyn in it at her party on Sunday. I sent a picture to my daughter and she showed her husband. He said it was impressive, which made me feel really good. Here's the finished product.

Tristyn's Birthday Outfit


Happy Sewing,
Carol


Thursday, October 24, 2013

Laga Handbags

We were across the aisle from Laga Handbags at Pacific International Quilt Festival last week. This is the second show in a month where we have been in close proximity to them. Here's a picture of their Besar Handbag. It is just one of many styles of bags and accessories that they have.


The company was founded to help the survivors of the tsunami in Indonesia. All of the products are made on treadle sewing machines. The shape of the bag is marked so the women know where to sew. Then each piece is free motion stitched within those guidelines. Since each one is individually made, no two are exactly alike. It really is amazing to watch.

It is interesting to see how the choice of thread on the fabric changes the look. Sometimes it is a tone on tone look. There was a beautiful bag that was black with black stitching which was a very elegant look. When I was talking to Amy, their consultant at the Tucson show a few weeks ago, she told me that she never knows what to expect when she gets new bags because the colors vary and so do the thread colors.

If you'd like to learn more about the making of these gorgeous, yet functional works of art and the story behind them just click on their logo on the right side of this page.


Wednesday, October 16, 2013

Smart Car vs Our Truck

This little Smart Car was parked next to us at our hotel recently.


When we looked at this tiny car next to our big truck we decided that it if we took the shell off it would probably fit in the bed. Pretty crazy.