Welcome

I'm so glad you decided to join me on my blog. I'll offer product tips, techniques and information. You'll also see the more personal side of our business. I hope you'll enjoy following us on this new journey. Carol

Tuesday, December 17, 2013

Bib for a Baby Boy

There is a big baby boom in my life.  As a result I've been collecting baby themed patterns for awhile since my daughters are having babies and so are their friends. This is one that I picked up in case someone I know has a baby boy.


The son of a very good friend of mine recently had a baby boy. The mommy and daddy are both lawyers so this pattern came to mind. I decided to do the Business Bib. These are the fabrics I chose.


I used two of the black and white fabrics from the Black Licorice Bits Fabric Collection and Kona Black.

Here's the finished product. If you look closely at the tie, you might see the "L" monogram. It didn't show up as well as I'd have liked. The fabric is a little too busy but I thought it was still a nice little detail.


When I auditioned the fabrics and decided what was going where I thought it would work. Now that it is done, I like it even better than what I envisioned. Don't you love when that happens?!


Sunday, November 17, 2013

Possible Free Motion Quilting Design

I never know when I'll see something that inspires me. We stayed at a hotel in Puyallup, WA last week for a show. We arrived on Tuesday and checked out this morning. Apparently I was so caught up in the work aspect that I didn't really notice my surroundings until this morning.

As I was packing my cosmetic bag I happened to notice the wallpaper in the bathroom. For some reason it caught my eye this morning. I had to take a picture because I think it would make a great free motion quilting design. I might have to make some revisions to it, but I think it would be a great filler stitch. What do you think?

It just goes to show that you never know where you'll be inspired. 

Happy Quilting,
Carol

Sunday, November 10, 2013

Sew Batik Challenge at NQA

We traveled to the Midwest and East this summer for some quilt shows. One of the shows we did was NQA (National Quilting Association) in Columbus, OH.Our good friends Bruce and Diane from Sew Batik sponsored a challenge at this show. The show had a patriotic theme so that was the theme for the challenge quilts. I have been to a lot of shows with a lot of challenge quilts. These were among the best quilts I have ever seen at a challenge. I want to share them with you here.


Look at all of those star points in the quilt on the top right. 


The quilting on the award winning quilt is amazing. You can see the texture of the extremely close lines of quilting. All of the parts of the fighter jet really stand out because of the way it is quilted.


I like the braided border in the Statue of Liberty quilt. The wine glass has an organza overlay to make it more realistic.


Two of the quilts in this grouping won ribbons. The flag has charms in the center of all of those tiny red squares and there are a total of 50 stars in the blue squares. Here's a close up of that quilt.


Stars and Sunbonnet Sue - What could be more Americana than that?


I love, love, love this mini Storm at Sea. What a great way to take a traditional block and change it up.


Here are a couple very non-traditional entries. The one with the faces probably has the most of the red challenge fabric that isn't a solid piece of any other quilt in the exhibit.


The top right hand quilt is a fun way to celebrate America and stitching, sewing and quilting. There's a pair of scissors, a pincushion and a quilt block in the design.


Quilts of Valor is such a worthwhile cause. It is great to see it represented in the Challenge Quilts.


This quilt incorporated crochet which I thought was very interesting so I wanted to share that detail here.


Isn't that Route 66 quilt fun? We drove along part of that road in our travels this summer. We had some free time one day and drove along a stretch of it in Albuquerque.

This is getting to be a very long post and this is only half of the quilts. I will do a second one with the rest of them soon.

Happy Quilting,

Carol


Thursday, November 7, 2013

The Outfit Was a Hit

Tristyn was so excited when she saw her Elmo Birthday Party Outfit. The party was at the My Gym that she has been going to for the past year or so. It was her last trip there are a regular student. She will be going to gymnastics next.

I didn't hear all of the comments but my daughter told me that many people were very impressed with the outfit. They thought she bought it on Etsy.

The trampoline is one of Tristyn's favorite activities. She even has a little one at home. One of her favorite things to do is "jump." Here she is jumping on the trampoline at her party.


She had cupcakes with hot pink icing for dessert. She blew out her "2" candle all by herself. Here she is surveying her cupcake tower.


I'm pleased with how the outfit turned out, even without the lace trim around the neck it looks very cute. It was definitely a labor of love.

Happy Sewing,

Carol

If you like this post you might like the one showing how I made this adorable outfit.  


Wednesday, November 6, 2013

New Design

I woke up on Sunday inspired to create. I started an applique tea towel pattern several months ago and had some ideas about how to finish it. Here's the inspiration for one of the new designs.

Photo and a drawing from EQ7
The basket was a little tricky to do. Here's what I ended up with. 


There's some adjusting to be done in the value of the apples. The yellow one disappears into the background. At 3:00 this morning I thought of an easier way to do the basket too. I'll give it a try and see if that idea works.

Happy Quilting,

Carol


Friday, November 1, 2013

Pillowcases for My Granddaughter

When we were at a show last spring I saw a fleece panel with a dog on it. It is a little bigger than crib size. Since my granddaughter, Tristyn loves dogs, I bought it and gave it to her for Easter. Since that night, it has been the "sheet" in her crib. Her mom and dad have to make sure that they wash and dry it around nap and bedtime because she won't sleep without her dog.

She turns 2 years old today. It is time for her big girl bed. My daughter asked me if I'd make her a pillowcase. Since the dog is made out of fleece, my daughter thinks that if her pillowcase is made of fleece it will be like her dog, soft against her face.

I found several options when I was in Hobby Lobby recently. I asked my daughter what to get. There was Elmo who is Tristyn's favorite (see my post about the Elmo outfit I made for her birthday party), pretty colors and Disney Princesses. Trystyn picked the princesses. Her favorite is Sleeping Beauty and the fleece I found had her as one of the princesses, but she was featured at the fold and close to the selvages. In order to get the most Sleeping Beauty I had to fussy cut the panel. I did that and realized that I would only get one pillowcase from a yard of fabric. Of course when I went back to get more, they were sold out. That meant I had to come up with another plan. I bought some purple fabric and figured if I had to, I'd make it two sided -princesses on one side and solid purple on the other.

I went to another store to try and find the same fabric. But all I could find was a similar one in pink. So I bought 2 yards of that (learning from the first one that I would have to fussy cut this fabric too). I ended up making two pillowcases. One is all pink princess fabric. Again making the most of the Sleeping Beauty parts of the fabric. Then I did the double sided princess and purple pillowcase. The hope is that she will like both of them and will want to use both. That would definitely make things easier for her mom and dad because they will be able to wash one and put the other on the pillow. We'll see what happens when she starts sleeping in her big girl bed. The dog will still be there. He is going to be her top blanket. Here are her finished pillowcases.


Back of the Purple Princess Pillowcase

These are just simple rectangles of fabric sewn around three sides and hemmed at the opening. That's all my daughter wanted. They are nothing fancy but I think Tristyn will like them.

Happy Sewing,

Carol


Thursday, October 31, 2013

Elmo Outfit

My granddaughter, Tristyn is going to be 2 years old on November 1st. She is having an Elmo themed birthday party. A few months ago while I was on Pinterest I found this outfit.


My daughter liked it so I told her I'd make it for Tristyn's birthday party. I was at a show over the summer and found a really cute Elmo print in a Fat Quarter so I picked that up. I also found the perfect red fabric. It looks a little bit like red fur so it will make a good Elmo face. My daughter wanted to incorporate pink into the outfit to make it more feminine but pink and dark red don't really go well together. I found some lace at another show that I thought might work. Here is what I'm starting with to make the outfit.


I like the inspiration piece but for a little girl I wasn't a big fan of the "suspenders." My original thought was to add a little ruffle to the sleeve. But then I decided that I'd just replace the sleeve with the Elmo fabric. I made a dummy from muslin just to try it out. When I figured out how much fabric that was going to use, I discovered that I wouldn't have enough leftover for the skirt.

Instead of my original idea I tore out one of the sleeves from the top I bought and used it to make a pattern. Then I measured to see how much fabric I'd have left after what I needed for the skirt. It was just enough for the sleeves.The sleeves are in.


I found a pretty trim which I think will add some femininity to the outfit. I've sewn that around the bottom of each sleeve. 


The next step is to add the face. I found a picture online and used that as my template. I played around with the size until it was what I wanted. Then I traced the different features onto fusible web and cut them out in fabric. I used an Applique Pressing Sheet to assemble all of the parts.

Left picture was my temlate for the fabric pieces. Right is the photo from the Internet. Center is the face in fabric

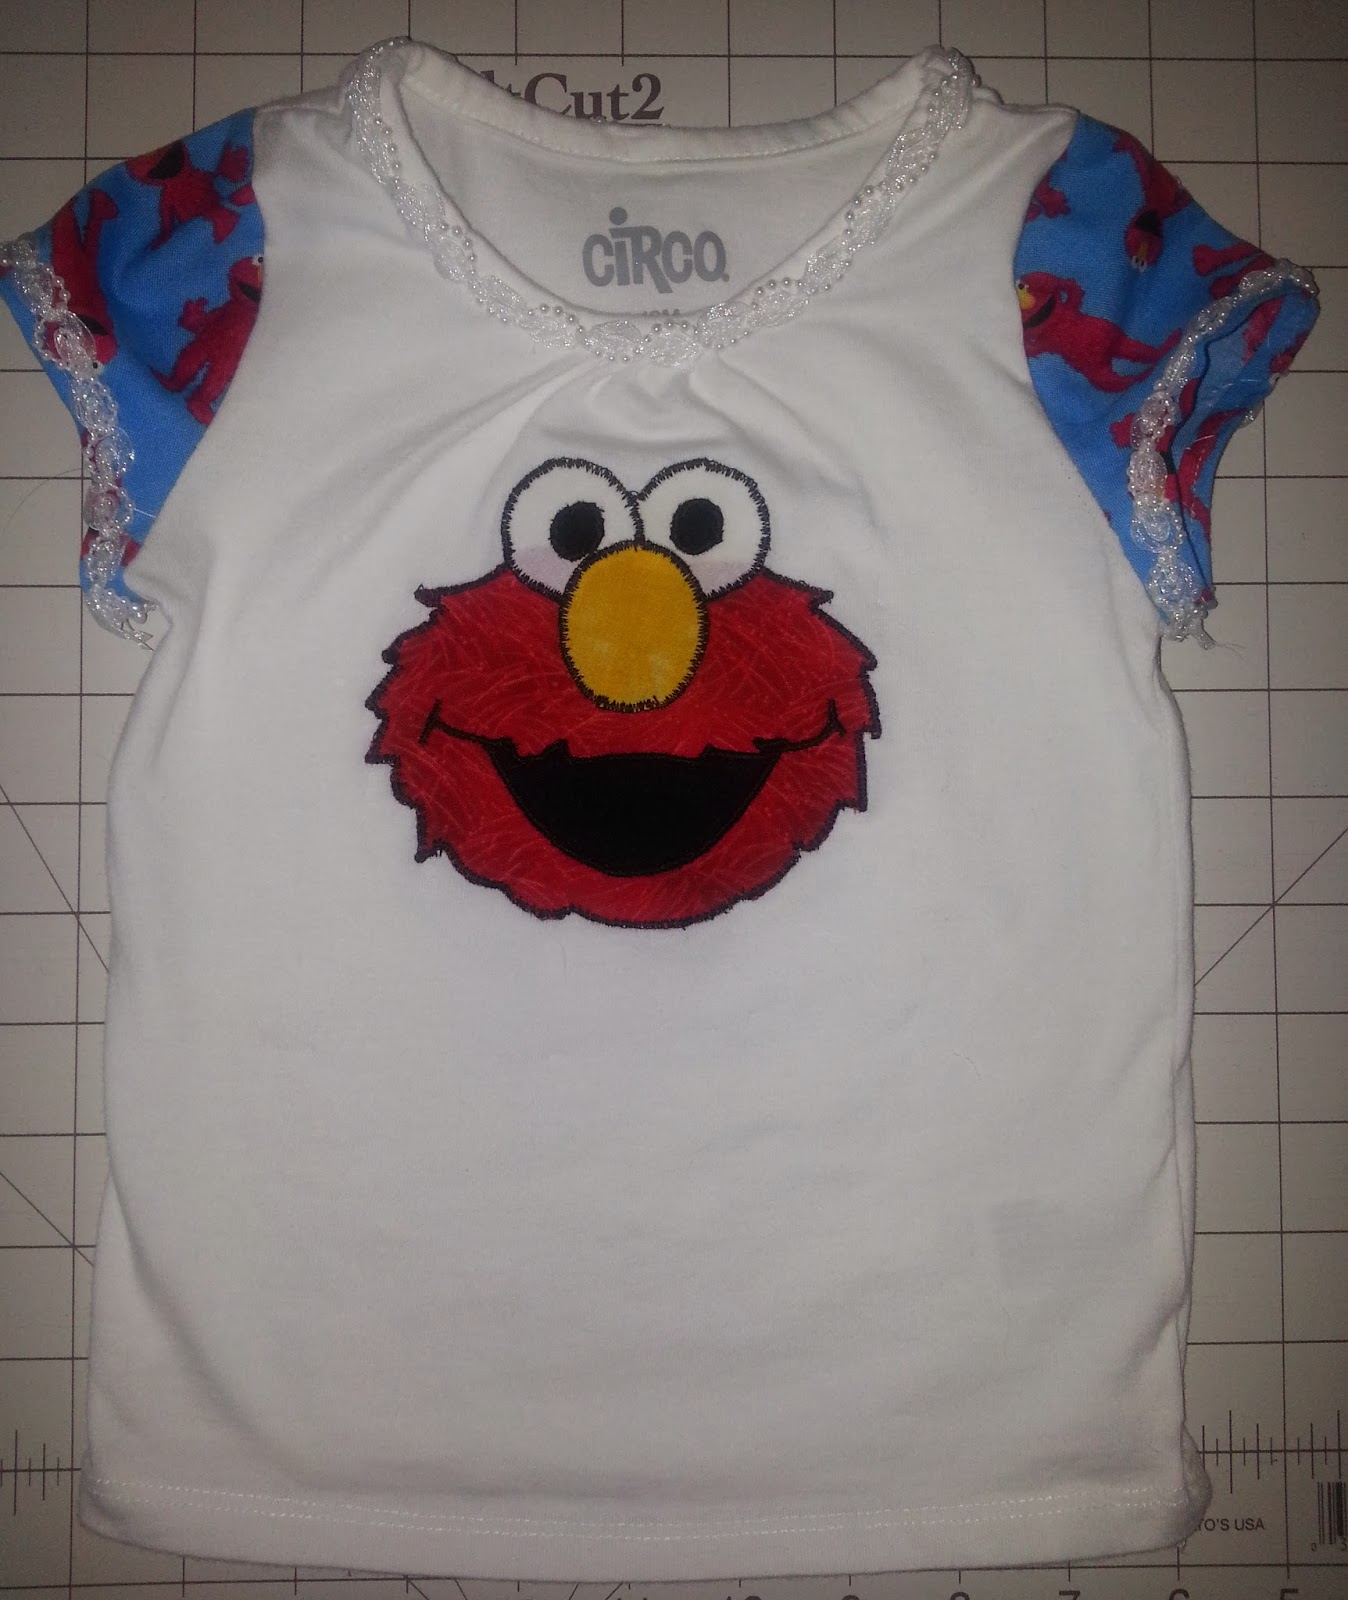
Now it is time to transfer it onto the shirt. I fused it in place. After looking at the pictures, I decided to do all of the stitching in black. I used a very small blanket stitch rather than a satin stitch at first but didn't like the way it turned out so I did a satin stitch which looks more like the pictures. All that's left is the trim around the neckline.


I used the same trim around the neckline. I'm really happy with how it turned out. I love it when I have a vision and the end result is even better than what I had in mind. Here's the finished top.


Next is the skirt. I want it to be full so even though Tristyn is pretty tiny, I used the full width of the fabric for my pieces. Since all I had was one fat quarter of the Elmo fabric I cut 2 strips 6" wide and sewed them together with a 1/4" seam. I cut the red fabric 10" wide. My original plan was to use the lace as an overlay to cover the red fabric. I finished the bottom of the Elmo and red fabrics by turning under 1/4" and then again another 1/4" and topstitched that. The lace has a nice scalloped edge so I didn't have to worry about finishing that.

When I put all of the layers together, I didn't like the way it looked. I tore everything apart and thought about it for a day or so. The lace just didn't look right. I decided to split the difference and  cut 1 1/2" off the top of the lace. Now it will be three separate layers. I like the way that turned out much better.


I got a little carried away with the project and decided to make hair bows too. I cut 2 - 5" circles from the leftover red fabric and 2 circles 1 1/2" from the tiny bits of Elmo fabric I had left. I put the Elmo fabric in the middle and made Yo-Yos from the red. I used the same trim and sewed that around the edges and filled up the inside. You can see a hint of the blue fabric, and if I had known when I started that I was going to add the trim, I probably would have left it out. But I got caught up in the embellishing.


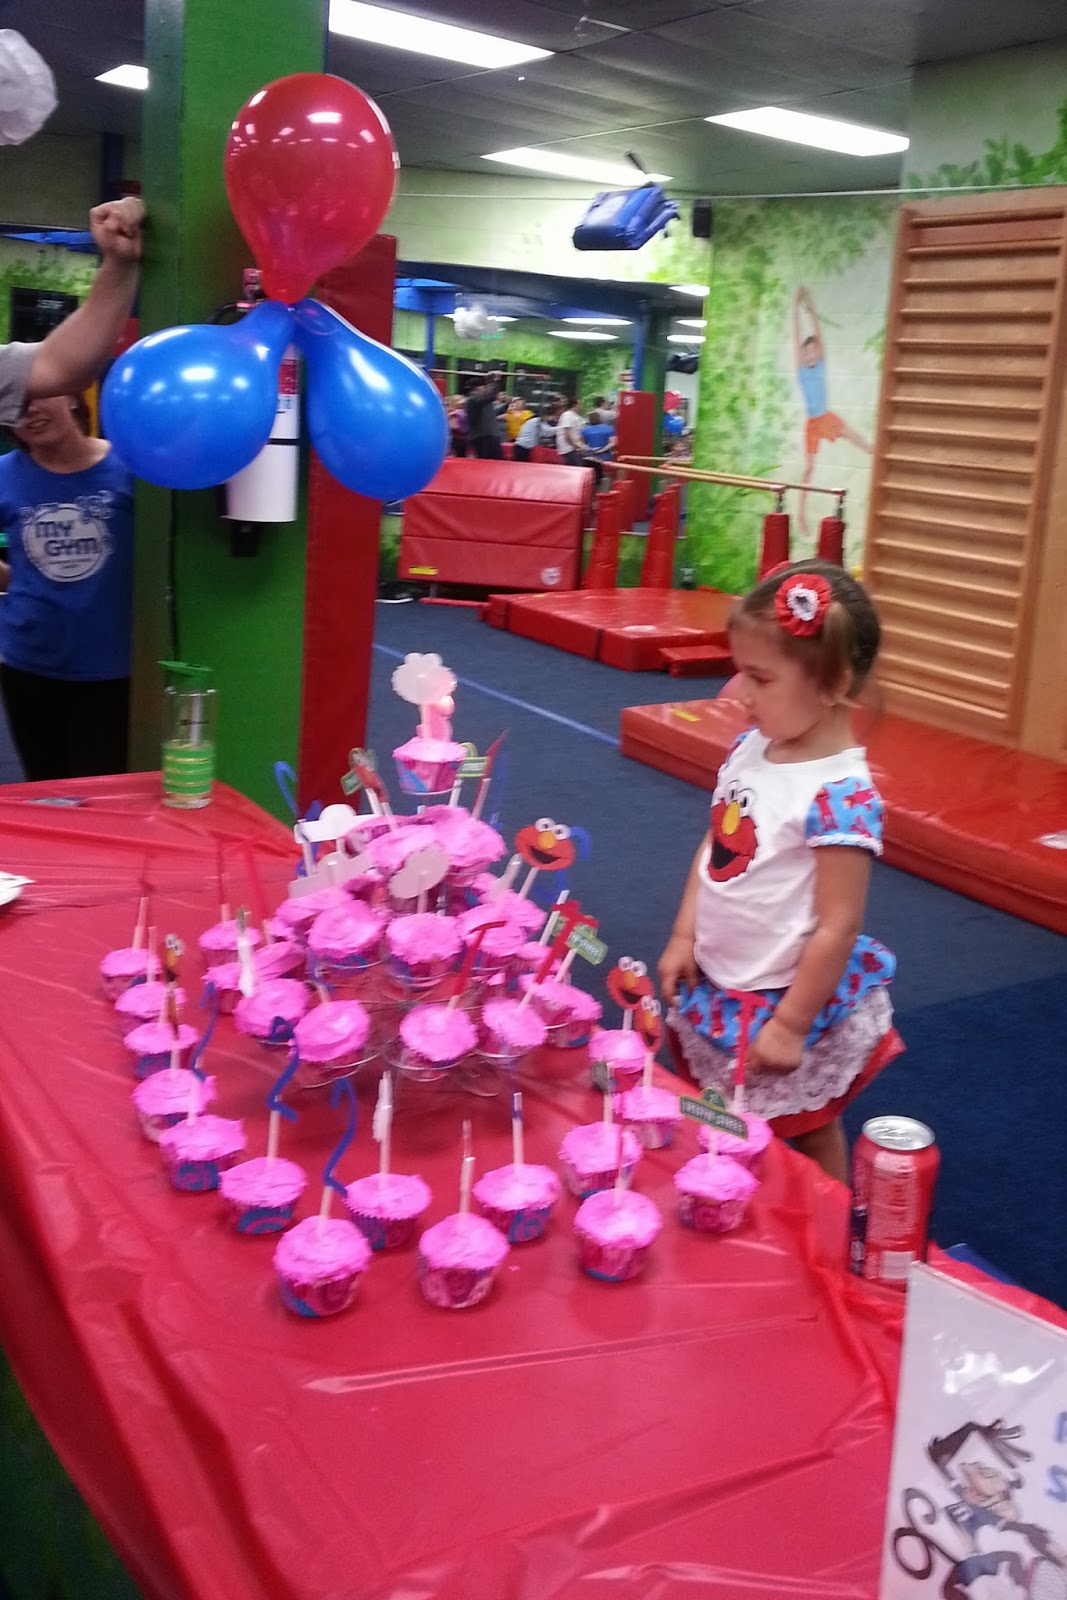
It has been a long time since I designed a garment. As a matter of fact, I'm not sure that I ever did; I always used a pattern. I was pleasantly surprised at how well I remembered all of those skills from when I made my own clothes and did Halloween costumes for my daughters when they were little. I think the outfit is adorable. I can't wait to see Tristyn in it at her party on Sunday. I sent a picture to my daughter and she showed her husband. He said it was impressive, which made me feel really good. Here's the finished product.

Tristyn's Birthday Outfit


Happy Sewing,
Carol


Thursday, October 24, 2013

Laga Handbags

We were across the aisle from Laga Handbags at Pacific International Quilt Festival last week. This is the second show in a month where we have been in close proximity to them. Here's a picture of their Besar Handbag. It is just one of many styles of bags and accessories that they have.


The company was founded to help the survivors of the tsunami in Indonesia. All of the products are made on treadle sewing machines. The shape of the bag is marked so the women know where to sew. Then each piece is free motion stitched within those guidelines. Since each one is individually made, no two are exactly alike. It really is amazing to watch.

It is interesting to see how the choice of thread on the fabric changes the look. Sometimes it is a tone on tone look. There was a beautiful bag that was black with black stitching which was a very elegant look. When I was talking to Amy, their consultant at the Tucson show a few weeks ago, she told me that she never knows what to expect when she gets new bags because the colors vary and so do the thread colors.

If you'd like to learn more about the making of these gorgeous, yet functional works of art and the story behind them just click on their logo on the right side of this page.


Wednesday, October 16, 2013

Smart Car vs Our Truck

This little Smart Car was parked next to us at our hotel recently.


When we looked at this tiny car next to our big truck we decided that it if we took the shell off it would probably fit in the bed. Pretty crazy.


Saturday, September 28, 2013

Prayer Pillow

I met Letha Price at the Rocky Mountain Sew Expo in Denver. She came to our booth because we have bags of Lavender.


She makes prayer pillows for her church.


These are about 4" square. The organza pocket holds a piece of paper with your prayer on it. You can slip it under your pillow and sleep on that prayer. She fills her pillows with 1 tablespoon of rice and 1 tablespoon of lavender. You could also use Crushed Walnut Shells in place of the rice.

As I was talking with Letha, a woman was listening to our conversation. She was so excited that she had to get more information. Her friend is undergoing chemo and she wanted to make one of these for her. She was so excited to go home and make one of them.

This is a simple project that could truly make a difference in someone's life. Sometimes I think that if I just write down my prayer that is enough to take it out of my hands and put it in God's. I can't wait to make some of these to give as gifts to people I know who need a little extra love and care.

If you need additional information, feel free to send me an email Carol@sewEZquilting.com . If you liked this post you might also be interested in the Guardian Angel post. It is another easy project that can be used for someone who needs a little comfort.

Happy Quilting and Stitching,

Carol


Friday, September 27, 2013

Back in Touch

It seems like forever ago since I was able to add a post to my Blog. I'm so happy that when I tried one last time today before officially moving my Blog that whatever the bug is that prevented this has been fixed. I have lots of posts drafted and many more to work on. All of that got sidelined when I was having so many problems with this.

I've missed you and look forward to staying in touch again.

Happy Quilting and Stitching,

Carol

Monday, June 24, 2013

Minnesota Quilters Quilt Show

If you saw my last Blog Post you know that we had a LOT of unpacking to do. We did manage to get everything in our booth. Here's a picture of the booth all set up.


At one point I had to take a break from the chaos of set up so I took a power walk through the quilts on display in the aisles right near our booth. Unfortunately that is all I was able to see of the quilts during the show but there were some gorgeous quilts on display. There were some that I have seen several times. This one really caught my eye though.

Look at all of the Half Square Triangles and points.
When you see the next photo you'll be even more impressed with this piece.

I'm not touching it
Don't worry. I'm not touching the quilt. I had to put my hand by the quilt so you could get a feel for how small it is. Turns out it won First Place in the Miniature Category. Those are a lot of triangles and points in a full size quilt. I can't imagine doing it on such a small scale! Very impressive!

Just had to share with you.

Happy Quilting,
Carol


Wednesday, June 19, 2013

Japanese Embroidery

I had the pleasure of spending some time with Kathryn Elms of Azumi Japanese Embroidery Studio from Roswell, NM when we were at the Albuquerque Fiber Arts Fiesta. The first time I was in her booth I was amazed at the framed pieces I saw. I spoke with her husband about it and he walked me through piece by piece and explained the different levels.

The next morning before the show opened I took Alan by to see what I was so excited about. This time Kathryn was free and explained some more about the process. She had a Power Point presentation that showed the history of Japanese Embroidery and the process.

She studied at the Japanese Embroidery Center in Atlanta, GA. This is the main source of education everywhere in the world, except Japan. It was founded in 1989. There are ten levels of instruction and one needs to complete all ten and pass their final in order to teach Japanese Embroidery. 

There is a lot more to it than what we think of when we think of embroidery. Think of the most beautiful kimono you have ever seen and the embroidery on it. This is the kind of embroidery I'm referring to.We are used to grabbing some fabric, needles and either perle cotton, floss or silk ribbon and that’s it. These are the tools that are used in Japanese Embroidery.

Tools for Japanese Embroidery
The fabric used is silk as is the thread. The designs are hand drawn onto the fabric at the Japanese Embroidery Center or JEC. Along with each design you get what is called a cartoon and a color version. The cartoon is where you document your stitches, threads, etc. That way if you want to reproduce it or in Kathryn’s case teach it, she has a record of what she did. These are very intricate designs. This is the design that she was working on in her booth.

The design Kathryn was working on. You can also see the thread she uses
 The embroidery is all done in a frame, similar to a quilting frame. The fabric is pulled drum tight and the first session of the five day Phase 1 class focuses on the mechanics such as how to get the piece in the frame properly and how the tools are used.

Kathryn Elms at work. She is using her left hand to help manipulate the thread. You don't just pull it through the fabric the way you would for a RedWork design.
The thread is silk and has 12 threads in a strand. There are techniques such as couching where a single strand is used. This is doubled and then is hand twisted. I played with some of Kathryn’s thread scraps. It is so soft and smooth. Just touching the thread is a very zen-like experience.  

This is the Phase 1 project. It consists of five days of classes, studying for 6 hours a day. That gives you the basics but just like in quilting and stitching classes, you learn the technique. Most of the time we don’t complete the project in class and that is definitely the case here.

Phase 1 Class Project

There are over 40 different Japanese Embroidery stitches to learn. Each phase of instruction adds more stitches and techniques. When you get to Phase 10, you go to the Japanese Embroidery Center to work on this project. It is a week of instruction. This is your “final.” They make sure that you have mastered every one of the stitches. When you have completed this and passed, you can then become an instructor. This is Kathryn’s Phase 10 piece.

Phase 10 Project


Here is a close up of the same piece.


I am absolutely fascinated with this. There was something very peaceful about the process. Meditation is actually incorporated into the instruction. One of the things that Kathryn told me is that her master teacher told her over and over again when she was learning that you need to forgive yourself. I felt so encouraged by this. The philosophy is that your work is your history. You learn from each phase and each project. So forgive yourself if you aren't perfect. Learn from the experience and you’ll do better as you progress. This is the way I teach too and I think for most people it makes the learning process more fun.

When I am off the road, I would definitely like to explore this fiber art medium. If you'd like to know more about Kathryn visit her website at http://www.azumijapaneseembroidery.com/. If you’d like to learn more about Japanese Embroidery and the Japanese Embroidery Center here is their website http://www.japaneseembroidery.com/nuido/index.html . You can watch a video that explains a little bit about it on their website. I have just barely scratched the surface.

Happy Stitching,

Carol

Sunday, June 16, 2013

Interesting Sights

We saw many interesting sights on our trip from Southern CA to Minnesota. One of them was the Great Platte River Road Archway in Kearney, NE. I saw signs for the arch and had no idea what to expect. Usually the freeway signs mean that you get off the highway at an exit and drive to whatever the landmark is. So I was pleasantly surprised when it turned out that it spanned the highway.

Great Platte River Road Archway


The Great Platte River Road Archway was completed in August of 1999. It is a tribute to the pioneers who crossed the country in covered wagons, on horseback, by stagecoach and train. It is an interactive museum that takes you back in time to the mid 1800s. Unfortunately we were in too big a hurry to get to our next stop so we didn't stop to experience it other than to drive under it. If we have a chance I'd like to stop and go inside another time. You can read more about it on their website http://www.archway.org/About/default.aspx .

Here are a pictures of the graphics on the sides of the bridge.

The left side of the Arch
This is what the other side looks like up close.


This is just one of the interesting things we have seen on this trip.

Here's to exploring new sights.

Carol


Monday, June 10, 2013

Heading to the Midwest

We left on Saturday for the Minnesota Quilters Quilt Show and Conference. This is our first of three shows in the Midwest. One of the biggest challenges in getting ready for the trip was getting the truck packed for these shows. We had to order extra product since some of our vendors don't drop ship.

Fortunately my husband, Alan, is really good at packing. We were recently at a show and when another vendor drove by our packed truck he asked if we still had room for a can of sardines. This trip we have even more in the truck.

This is what the back part of the truck looked like the day before we left.


Those two orange straps are what holds our hand truck on the back of the truck. There might be a tiny bit of room above our poles on the right side but if there is it isn't much.


You can see our two DMC thread chests.They sit on top of the boards that give us some elevation in the back of the booth. Underneath that is all of our grid wall. Anything that is skinny enough to fit gets stuck in the little "dead space" created by the wheel well.


Crates are stacked on top of each other and small boxes that hold patterns are piled on top of them. You can see our tables and the racks that sit on the tables with our tea towel models on them.

Tuesday is set up day for the show. We will unload everything and get all of this in our 10' x 20' booth. I did a Blog Post about that process awhile back. That was before we added Bird Brain Designs and all the RedWork Accessories. But you'll get an idea of what is ahead of us tomorrow.

Happy Quilting and Stitching,
Carol