Welcome

I'm so glad you decided to join me on my blog. I'll offer product tips, techniques and information. You'll also see the more personal side of our business. I hope you'll enjoy following us on this new journey. Carol

Showing posts with label Embroidery. Show all posts

Sunday, March 16, 2014

Another Stitching Turned Applique Project

I've been changing up the Harvest Tea Towels pattern. Since I like to do different things, I decided that instead of stitching the designs on tea towels, I'm going to make it into a small wall hanging. I have one block left to finish stitching before I get to that project.


I recently finished the acorn block. While I was working on it I thought that it would make a nice applique block. 


I played around with this concept in another Blog Post with the Snowman from the Winter Partners Pillows Pattern.


I decided to use a Brown Striped Tea Towel. I found these pretty fall batiks and hand dyes to work with. I like them for fusible applique because they have a high thread count. A tea towel will be washed so I wanted fabrics that aren't likely to fray much.


I traced the REVERSE image of the design onto fusible web. Since the fusible goes on the wrong side of the fabric, if you don't reverse the design when you fuse it onto the background fabric (tea towel in this case) the image will be the mirror image of the drawing. This time I added a little extra to the pieces that will go underneath others, like the basic acorn shape and the stem. When I did the snowman I didn't do this and it made it a little harder to put the pieces in place. I decided not to add the bird. I kind of have a problem with the scale. Either the bird is super tiny or the acorn is HUGE. I roughly cut around the pieces and fused them to the wrong side of my fabrics.


I cut out each individual piece. I used an Applique Pressing Sheet (See previous Blog Post) to make the fusing process much easier.


I put each piece in place on top of the Pressing Sheet using the pattern as my guide. Once I had it exactly how I wanted it I fused the entire design onto the Pressing Sheet. 


Now the whole thing is one piece which makes it so much easier to put onto the towel. I just peeled it off and placed it where I wanted it on the brown tea towel. Then I fused the design onto the towel. 
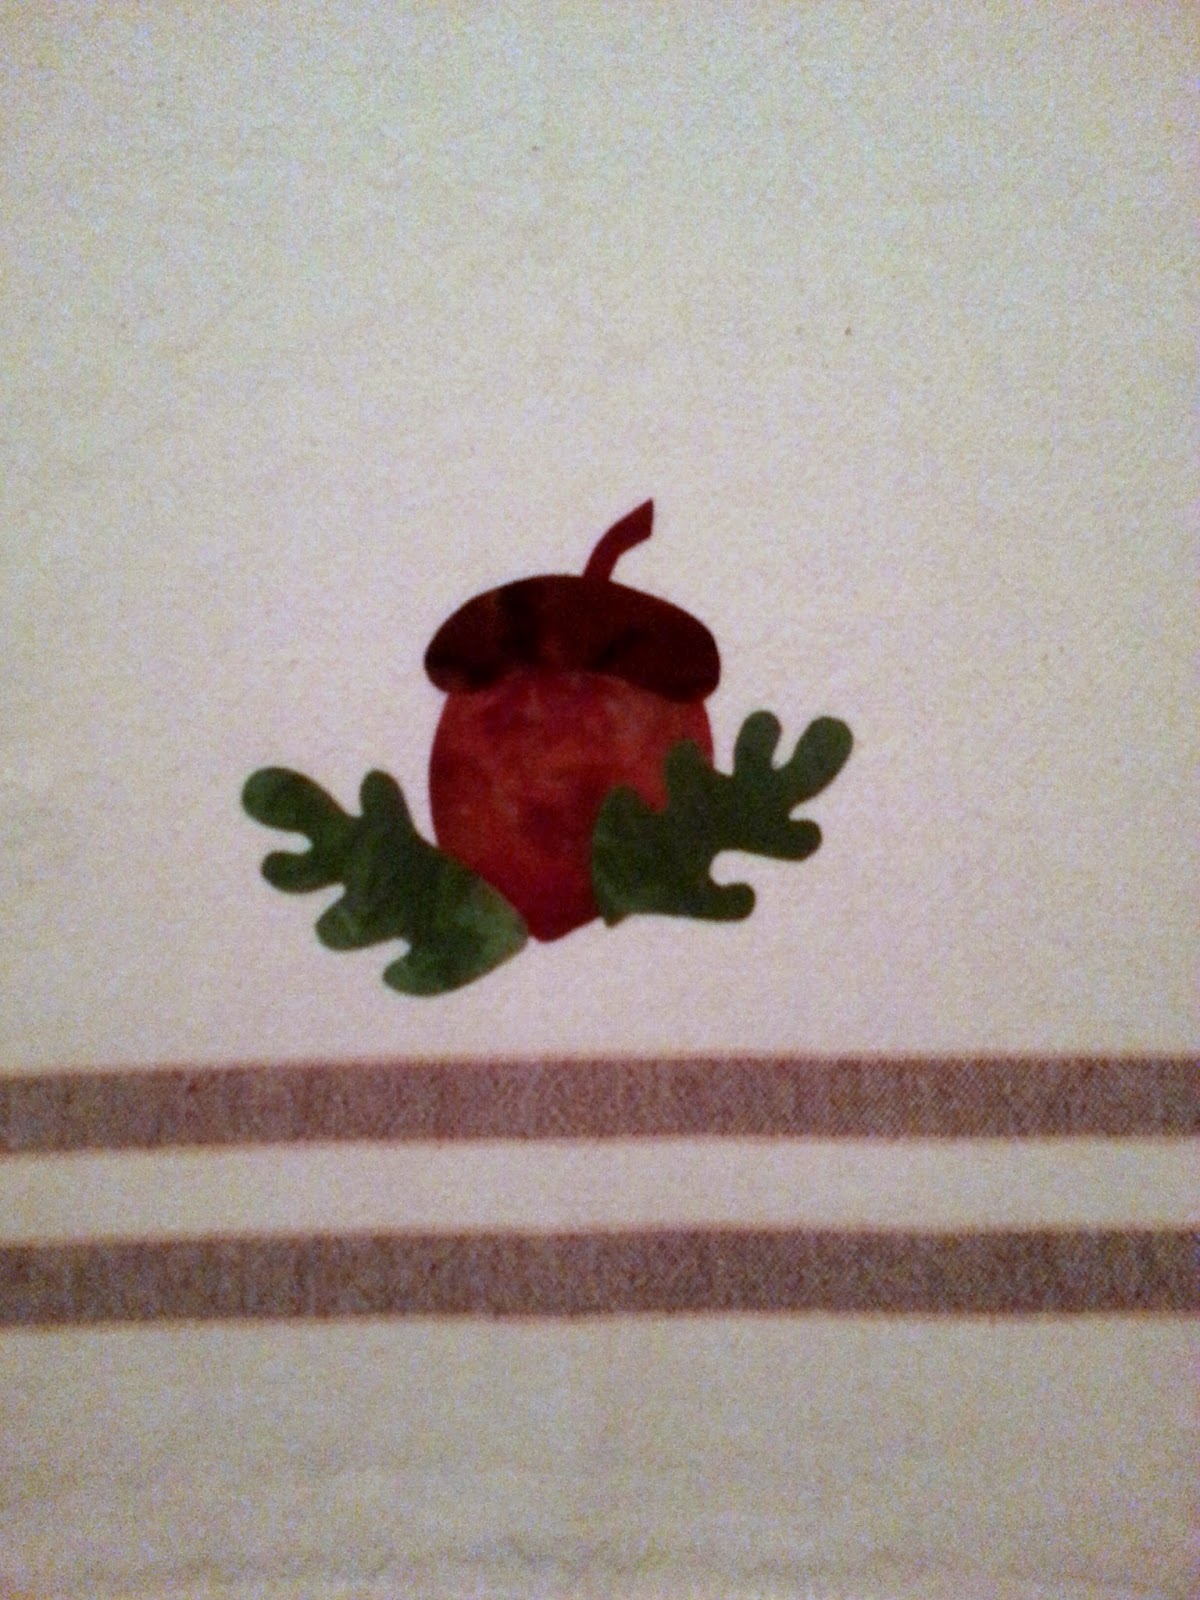

I put a tear away stabilizer behind the design. You could also use a wash away such as Sticky Fabri-Solvy. Since the towel will be washed the Sticky Fabri-Solvy will dissolve in the washer. You want the stabilier behind so that when you stitch around the design it doesn't pucker.


Most of the time I use a short blanket stitch on  my machine to stitch around the fused pieces. I have also used a satin stitch and a free motion zig zag. In this case all I wanted to do was stitch it in place. I wasn't worried about adding texture to the design so the blanket stitch worked just fine. This is the setting I used.


This was a fast and easy project. It took me about an hour from the time I decided to do it until I was done stitching around the design. It will be a nice addition to my home this fall. It would also make a nice gift.


Happy Quilting,

Carol


Wednesday, June 19, 2013

Japanese Embroidery

I had the pleasure of spending some time with Kathryn Elms of Azumi Japanese Embroidery Studio from Roswell, NM when we were at the Albuquerque Fiber Arts Fiesta. The first time I was in her booth I was amazed at the framed pieces I saw. I spoke with her husband about it and he walked me through piece by piece and explained the different levels.

The next morning before the show opened I took Alan by to see what I was so excited about. This time Kathryn was free and explained some more about the process. She had a Power Point presentation that showed the history of Japanese Embroidery and the process.

She studied at the Japanese Embroidery Center in Atlanta, GA. This is the main source of education everywhere in the world, except Japan. It was founded in 1989. There are ten levels of instruction and one needs to complete all ten and pass their final in order to teach Japanese Embroidery. 

There is a lot more to it than what we think of when we think of embroidery. Think of the most beautiful kimono you have ever seen and the embroidery on it. This is the kind of embroidery I'm referring to.We are used to grabbing some fabric, needles and either perle cotton, floss or silk ribbon and that’s it. These are the tools that are used in Japanese Embroidery.

Tools for Japanese Embroidery
The fabric used is silk as is the thread. The designs are hand drawn onto the fabric at the Japanese Embroidery Center or JEC. Along with each design you get what is called a cartoon and a color version. The cartoon is where you document your stitches, threads, etc. That way if you want to reproduce it or in Kathryn’s case teach it, she has a record of what she did. These are very intricate designs. This is the design that she was working on in her booth.

The design Kathryn was working on. You can also see the thread she uses
 The embroidery is all done in a frame, similar to a quilting frame. The fabric is pulled drum tight and the first session of the five day Phase 1 class focuses on the mechanics such as how to get the piece in the frame properly and how the tools are used.

Kathryn Elms at work. She is using her left hand to help manipulate the thread. You don't just pull it through the fabric the way you would for a RedWork design.
The thread is silk and has 12 threads in a strand. There are techniques such as couching where a single strand is used. This is doubled and then is hand twisted. I played with some of Kathryn’s thread scraps. It is so soft and smooth. Just touching the thread is a very zen-like experience.  

This is the Phase 1 project. It consists of five days of classes, studying for 6 hours a day. That gives you the basics but just like in quilting and stitching classes, you learn the technique. Most of the time we don’t complete the project in class and that is definitely the case here.

Phase 1 Class Project

There are over 40 different Japanese Embroidery stitches to learn. Each phase of instruction adds more stitches and techniques. When you get to Phase 10, you go to the Japanese Embroidery Center to work on this project. It is a week of instruction. This is your “final.” They make sure that you have mastered every one of the stitches. When you have completed this and passed, you can then become an instructor. This is Kathryn’s Phase 10 piece.

Phase 10 Project


Here is a close up of the same piece.


I am absolutely fascinated with this. There was something very peaceful about the process. Meditation is actually incorporated into the instruction. One of the things that Kathryn told me is that her master teacher told her over and over again when she was learning that you need to forgive yourself. I felt so encouraged by this. The philosophy is that your work is your history. You learn from each phase and each project. So forgive yourself if you aren't perfect. Learn from the experience and you’ll do better as you progress. This is the way I teach too and I think for most people it makes the learning process more fun.

When I am off the road, I would definitely like to explore this fiber art medium. If you'd like to know more about Kathryn visit her website at http://www.azumijapaneseembroidery.com/. If you’d like to learn more about Japanese Embroidery and the Japanese Embroidery Center here is their website http://www.japaneseembroidery.com/nuido/index.html . You can watch a video that explains a little bit about it on their website. I have just barely scratched the surface.

Happy Stitching,

Carol

Thursday, January 17, 2013

Perle Cotton Bubbles

Looking for a great way to control your balls of perle cotton? Our "Bubbles" really come in handy. Since I lead a "grab and go" lifestyle I usually just put everything I'm working on it a tote bag and carry it everywhere to work on whenever I have free time. The first time I did this, I went to grab a ball of perle cotton and it had  unrolled and gotten tangled up. After that experience I make sure that all of my thread is contained in one of our Perle Cotton Bubbles.


I wish I could take credit for this idea but it came from the creative, always inspired Robin and Tina Kinglsey from Bird Brain Designs. But I totally embrace the idea. It keeps everything nice and neat. Here's what's involved in getting these ready for you. 

We order them in a box of 2000. The bottoms come in one box.


Here's what 2000 "Bubbles" look like.


This is 2000 Lids


Now all they need is the little hole. This is where ours differ from those you buy from Bird Brain Designs. If you notice in the picture above, there is a hole in the end of the Bubble. This requires drilling a hole in the bottom. We tried this but I found that there was a little burr from the drill bit which I thought could be a problem when pulling the thread through the hole. We tried smoothing it out but I just wasn't happy with it. So we put the hole on the side of ours. 

This means that my husband, Alan punches a hole with a hole punch in the side of every one of those Bubbles. He does it from the inside so there is nothing rough near the thread. It is a very smooth hole. Talk about a time consuming and tedious task. Not to mention that if he does too many at a time he gets a blister in the palm of his hand. 


I have tried every hole punch I can find to try to make it easier but the one that works best is the good old fashioned cheap metal one. The more ergonomic ones break after just a couple punches.

The Official "Bubble" Hole Punch
Our 13 month old granddaughter Tristyn likes to "help." She likes to play in the box or grab them and give them to Grandpa to punch the holes. She gets a little frustrated with him when he can't punch holes as fast as she gives them to him.

Our Granddaughter Tristyn - 13 Months Old

They are available individually or in our Perle Cotton Bubble Pack of 12.He also counts out the bubbles and lids and packs them up in bags. This way when you want 12 they are already packaged up for you.


So next time you're stitching and pulling the thread through your Perle Cotton Bubble you know what went into getting that ready for you.

Happy Stitching,
Carol


Thursday, January 10, 2013

New Wall Hanging Project

Ok. I know Christmas just ended and you're probably wondering why I would post a Christmas themed project when you just finished putting all the decorations away. Two reasons - One I just finished it and really wanted to share it with you. Two - There's plenty of time to get started on it now and finish it in time for next Christmas.

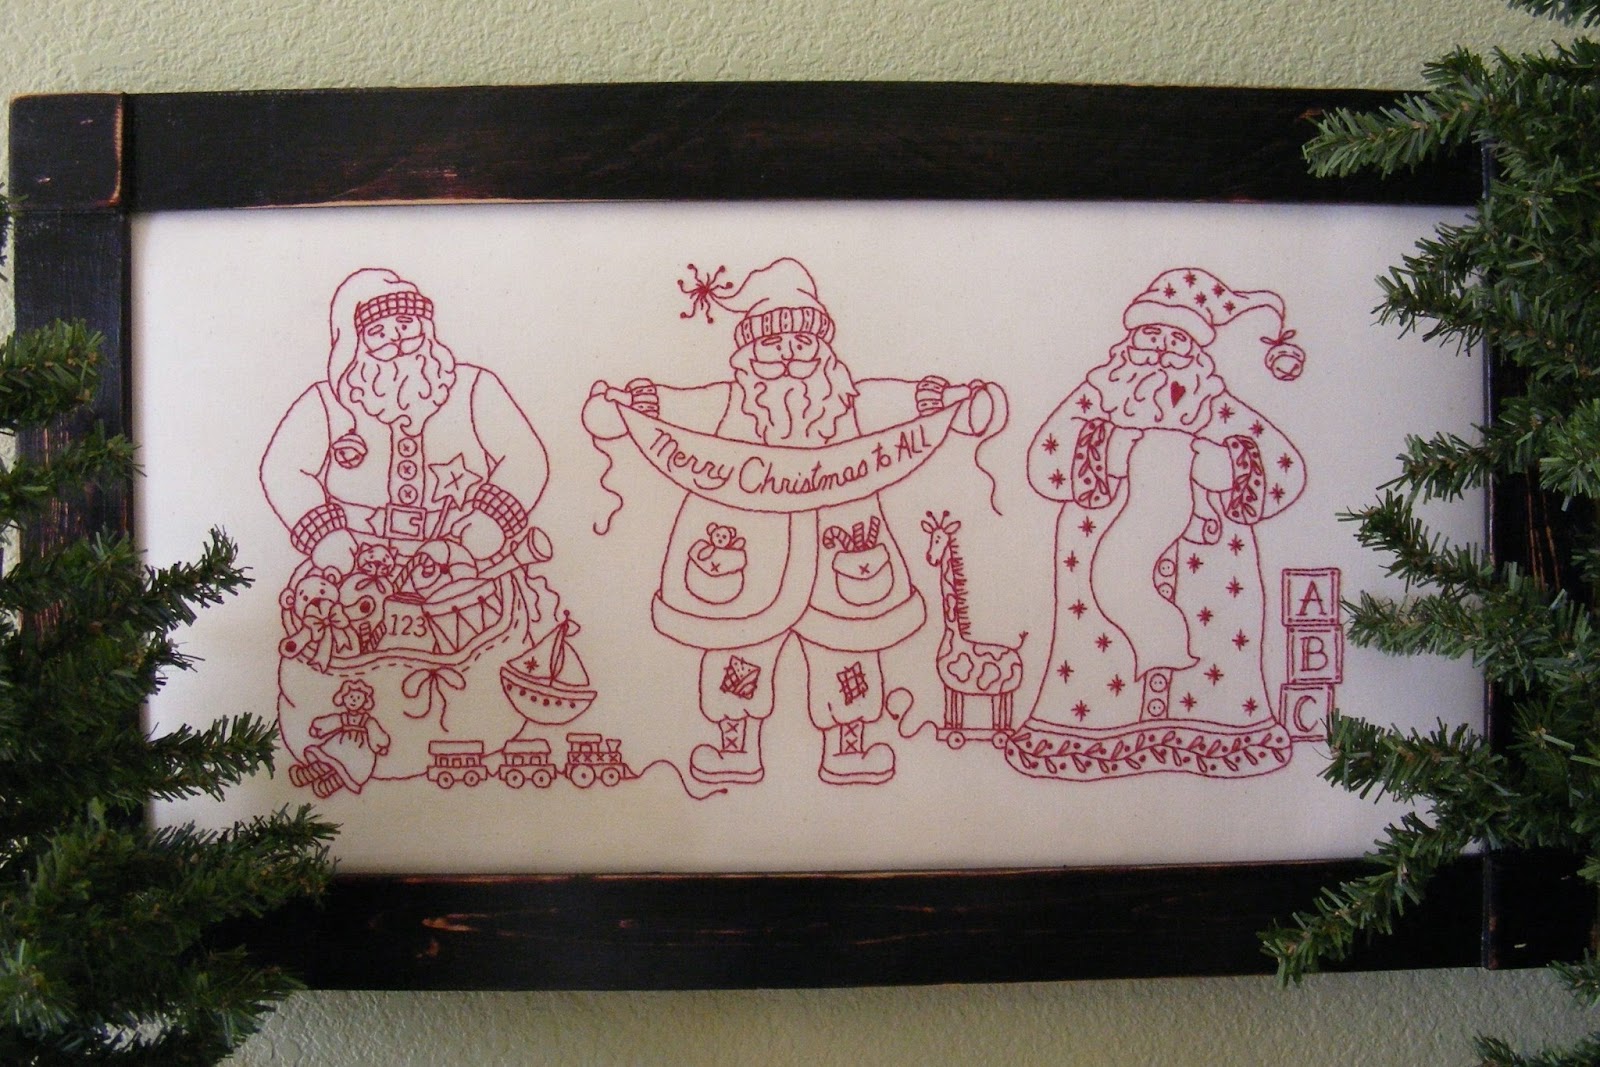
This wall hanging in this post is my version of the Santa Portrait Trio Pattern by Bird Brain Designs. I have posted pictures in previous blog posts about the blocks. Now I have put them together.

Santa Portrait Trio Pattern Photo


I knew when I decided to make this that I wanted to keep the feel of a portrait but I also wanted to do something different. I wanted it to be a quilted project rather than a framed piece. I finished stitching the blocks and set them aside until I figured out how to set them. I toyed with traditional sashing and possibly little stitched cornerstones but that was too obvious and kind of boring. Then I thought of Attic Windows but I still didn't think it was the right setting.

You never know when or where inspiration will strike. I was in Michael's one day looking for I don't even remember what. I walked past the picture frames and I had the solution to my problem. Here's my inspiration.


Once I had the plan I was really excited to get going on it. I decided that I wanted to do 8" x 10" blocks so they would be a standard photo size. So I trimmed my blocks to 8 1/2" x 10 1/2".

Next came the math part. I decided to have a 1" finished border around my blocks. I measured the size of the small black border in the photo and the white piece between the pictures. I used those measurements to apply the same ratio to my project. I used the same technique to choose the two outer borders. Keeping with the style of the sample frame, I mitered all of my borders.

There was a lot of "dead" space in the first wide border. I quilted a holly motif on the top and bottom borders. In the center of the sides I quilted a single Christmas Tree and finished the rest of the side borders with the same holly motif. 

Now for the finished project.

My Santa Portrait Trio Wall Hanging

Here's what it looks like on the back.

Quilting Detail

We usually think of a color for borders and sashing fabrics. I know that had I done it that way it would have been a completely different look. When I look at the finished product, I think I achieved the look I was going for. It looks like framed Santa photos.

Happy Quilting and Stitching,

Carol


Thursday, January 3, 2013

Friendship's Garden Quilt

I just finished this quilt. I had so much fun putting it all together I wanted to share the process with you.

First I want you to know that I can't take credit for the embroidery in the blocks. My friend Holly from Quilter's Cove had one of her employees do the stitching. She was going to put them together and never got around to doing that so she passed them on to me. I've had them for a couple months but finally had the time to assemble the quilt.

I tried a few different fabrics for the sashing. It was kind of like Goldilocks. I thought I had the perfect green. When I actually sewed the sashing between the blocks in the first row, I hated it. It was too bright. I toyed with black but it just didn't fit with the cheery blocks. Next I tried red. It matched the red in the blocks, but it came out too dark. Most of the cornerstone fabrics didn't show up and I wanted to add that extra sparkle of color. Finally I tried the pink. I thought it was way too much pink, but when I actually sewed the sashing into that first row, I really liked it. That was the winner. However, I didn't like that it was a solid fabric. It was a little too plain.

Section of Plain Pink Sashing
I recently saw the book "Doodle Quilting" by Cheryl Malkowski on SewCalGal's Blog. I bought a copy right away because I knew it would come in handy for the Santa Portrait Trio quilt I'm working on. I found the perfect way to incorporate some of the "doodles" in the book into the sashing to break up all that solid pink.

I chose to do a combination of leaves, circles and flowers as the quilting motif for the sashing. Instead of choosing a pink thread that would blend into the sashing, I chose to do the quilting in green. I wanted it to look like a printed fabric rather than a solid. Here's  what one of the sashing strips looks like quilted.

Sashing with the Quilting

After I had done a good part of the quilting, I got really excited. I had achieved the look I was going for. It was pink with an added splash of color and texture. Don't you just love when that happens?

Partially Quilted

Here's what a small portion of it looks like from the back.


 I added yellow for the binding to give it a little more color and sparkle. Here's the finished quilt.

Finished Friendship's Garden Quilt

I'm really pleased with the way it turned out. I'd love to know what you think. 

Happy Quilting and Stitching,
Carol


Friday, December 7, 2012

Celebrate The Seasons Banner

I just finished putting together my version of the Celebrate the Seasons pattern. Now that I'm feeling more confident with my stitching, it is time to branch out and apply my same philosophy to my Redwork projects as I do to my quilting projects. My mom taught me many years ago when I first started quilting that it is my quilt and I can use any fabric I want and make it any way I want. It doesn't have to look just like the picture. Once in awhile I do something similar to the pattern but more often than not, I put my own spin on things.

Here's an example of what I'm talking about. Here is the pattern for a quilt I was asked to make a sample of to test the pattern and then to sell at shows.

The Pattern


Here's a picture of my finished quilt:

My Confetti Quilt
I've been making minor changes to some of the Bird Brain Designs patterns but for the most part, except for fabric choices, I've made them like the pattern. Celebrate the Seasons is the first one I've done where I've really changed it up to make it mine.

So just like I have shown above, here is the picture from the pattern for the project.

Celebrate the Seasons
And here is my version that I just finished this morning.

My Version of Celebrate the Seasons
It is going to make its show debut at the Tucson Quilt Fiesta! in January. I have been working hard to get UFOs finished during my break. I hope to have several new things in our booth by then.

Happy Quilting and Stitching,

Carol


Wednesday, November 14, 2012

New Bolts of Fabric


It has been awhile since I have had a chance to go "bolt" shopping. While we were on the way to Puyallup, WA for the Northwest Quilt, Craft & Sewing Festival this weekend, we stopped at the EE Schenck warehouse. This was my first trip to that facility, and it definitely won't be my last. It is 80,000 square feet of fabric, notions, batting, books, and patterns. All I was interested in was fabric, and believe me that was overwhelming in itself. I'm glad that was all I had to worry about.

EE Schenck Warehouse in Portland, OR


I was looking for some fabric to finish up a couple models for our booth. I wanted some to have on hand to use in future samples and some just to sell as 1 yard cuts.

I knew I would have limited time, both because I needed to get to Puyallup and because Alan has a limited amount of patience for things like this. He doesn't get as excited being around all those gorgeous fabrics as the rest of us do. So I went online before we got there. Found the fabrics I was interested in  and made a list. Once I got there I found out that it doesn't really work that way. That just means they carry those fabrics. They might not be in stock. So my great plan went out the window. With rows and rows of fabric to now look at I was BRIEFLY overwhelmed. Then I took a couple deep breaths and started walking the aisles.

I found things that I knew were perfect right away. I grabbed those. Made notes of things that I thought would work. Things that I added to a "Wish List"for later. 

I also had to audition fabrics to finish up my Friendships Garden Quilt. Here are a couple pictures of that process. I think I finally got the winning combination but I was so busy writing down the SKUs and other information that I forgot to take a picture. 

Option 1


Option 2
I'm still thinking about it though. At first I thought the red was overpowering, now I'm not so sure. There is red in the blocks and it is just going to be in some of the cornerstones of the sashing. So maybe it isn't as out of place as I originally thought. What do you think? Leave me your suggestions in a comment.

I'll finalize the fabrics for Friendships Garden this weekend. Then I'll order them after Thanksgiving. I'll get to work on them right away so I can get the quilt finished during my break between Thanksgiving and the second week of January. Fortunately the blocks are all done. All I have to do is assemble the quilt top, quilt and bind it.

Here are the fabrics that I came away with yesterday.


I'll cut some of these up tonight and they will be for sale in the booth tomorrow. I'll put them on the website after the show.

Happy Quilting,
Carol